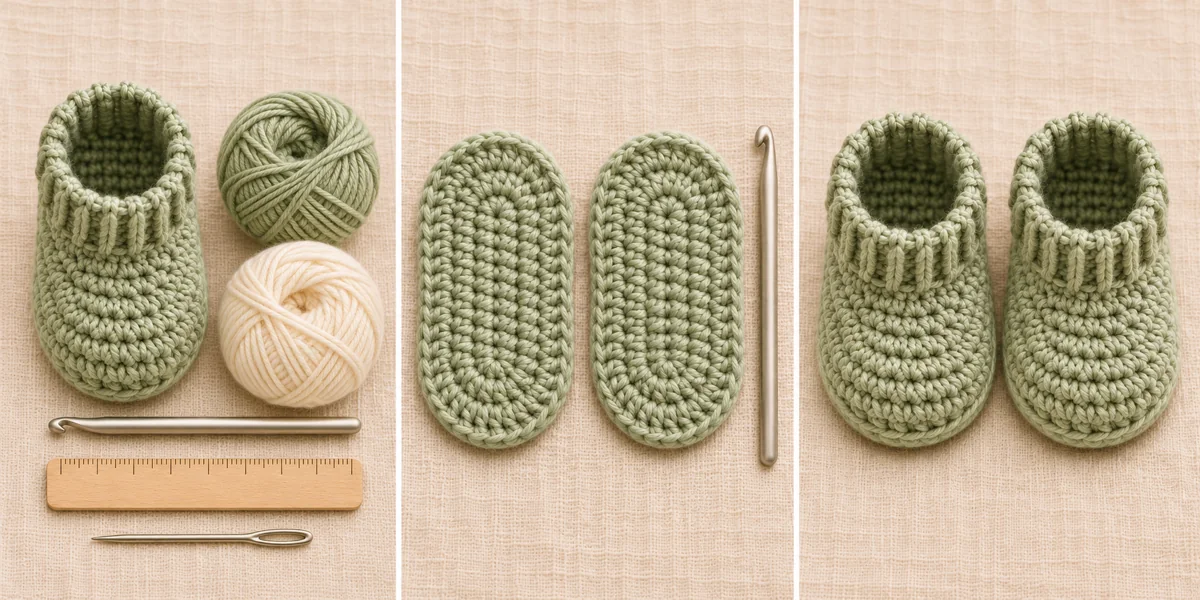
Make a simple pair of crochet baby booties with rounded toes, a low ankle, and a short ribbed cuff. Each bootie begins with an oval sole and continues upward in joined rounds, so there is no separate upper to sew on. Choose a size by measuring the foot, then check the first sole before working the upper.
Jump to the pattern · Find your size · Finish the pair
Pattern status: This original draft has been reviewed for stitch-count arithmetic but has not been test crocheted. Finished measurements, yarn usage, fit, and toe shaping still need a physical sample check. All images are AI-generated illustrations of the intended design, not photographs of tested samples.
Project at a Glance
| Skill level | Confident beginner with experience working in joined rounds |
|---|---|
| Terms | US crochet terminology |
| Construction | Oval sole, shaped upper, and post-stitch cuff; worked in one piece |
| Sizing | Three draft sizes; choose by foot measurements and the measured sole, rather than age |
Materials and Gauge
- Smooth, soft DK-weight yarn. Yarn quantity has not been measured; check your yarn supply before starting and keep enough of the same dye lot for both booties.
- 3.5 mm crochet hook as a starting point; adjust after measuring the first sole.
- Two removable stitch markers, a ruler or tape measure, scissors, and a yarn needle.

Gauge check: No tested stitches-per-inch gauge is available for this draft. Work Sole Rounds 1–3, lay the sole flat without stretching, and measure heel to toe and across the widest part. Compare the length with the sizing targets below and check the width against the intended foot. Try a smaller hook if the sole is too long, or a larger hook if it is too short, then remake and measure. The fabric should also feel soft and flexible; changing the hook is not enough if it makes the fabric too stiff or loose.
Size Chart
Measure from the heel to the longest toe. As an initial fitting allowance for this draft, aim for a sole approximately 0.5–1 cm longer than the foot. Check the width and cuff opening as well. These are design targets, not verified finished measurements or age-based sizes. Your measured first sole determines whether the chosen yarn, hook, and size are suitable.
| Size | Target sole length | Foundation chain | Stitches after Sole Rnd 3 |
|---|---|---|---|
| Small | 9 cm (about 3½ in) | 12 | 36 |
| Medium | 10 cm (about 4 in) | 14 | 40 |
| Large | 11 cm (about 4⅓ in) | 16 | 44 |
Abbreviations and Pattern Notes
- ch: chain; st(s): stitch(es); sl st: slip stitch; rnd: round.
- sc: single crochet; hdc: half double crochet; dc: double crochet.
- BLO: back loop only; use the back loop at the top of the stitch.
- inc: work 2 sc in the next stitch.
- hdc2tog: yarn over, insert the hook in the next stitch and pull up a loop; yarn over, insert the hook in the following stitch and pull up a loop; yarn over and pull through all 5 loops. This uses 2 stitches and makes 1.
- FPdc / BPdc: front-post / back-post double crochet. Work a dc around the vertical post instead of into the top loops. For FPdc, insert the hook from front to back and back to front around the post. For BPdc, insert from back to front and front to back around the post.
Instructions are written Small (Medium, Large). Make two identical booties. Join each round with a sl st in the first actual stitch; do not turn. Begin sc and hdc rounds with ch 1, and dc or post-stitch rounds with ch 2. Starting chains and joining slip stitches never count as stitches. Work the first stitch into the same stitch as the join, or around that stitch’s post for the cuff. Skip the starting chains and joining slip stitch when counting.
Free Crochet Baby Booties Pattern
Step 1. Crochet the Oval Sole
- Rnd 1: Ch 12 (14, 16). Work 3 sc in the second ch from the hook. Sc in each of the next 9 (11, 13) ch. Work 3 sc in the last ch. Rotate to work along the underside of the foundation chain. Sc in the unused underside loop of each of the next 9 (11, 13) ch. Do not add another stitch into the chain containing the first 3 sc. Join. 24 (28, 32) sts.
- Rnd 2: Ch 1. Inc in each of the next 3 sts, sc in the next 9 (11, 13) sts, inc in each of the next 3 sts, sc in the next 9 (11, 13) sts. Join. 30 (34, 38) sts.
- Rnd 3: Ch 1. (Sc in the next st, inc in the next st) 3 times; sc in the next 9 (11, 13) sts; (sc in the next st, inc in the next st) 3 times; sc in the next 9 (11, 13) sts. Join. 36 (40, 44) sts.
Measure the sole before building the upper. The curved end containing the join becomes the heel; the opposite curved end becomes the toe. Keep the round beginning in the same place throughout. At the end of Rnd 3, place a second marker in stitch 23 (25, 27), counting the first actual stitch as stitch 1. This is the planned center toe stitch.

Step 2. Shape the Upper
- Rnd 4: Ch 1. Hdc BLO in every st. Join. 36 (40, 44) sts.
- Rnd 5: Ch 1. Hdc through both loops in every st. Join. 36 (40, 44) sts.
- Rnd 6: Ch 1. Hdc in the next 14 (16, 18) sts, hdc2tog 4 times, hdc in the next st, hdc2tog 4 times, hdc in the last 5 (7, 9) sts. Join. 28 (32, 36) sts.
- Rnd 7: Ch 1. Hdc in the next 14 (16, 18) sts, hdc2tog twice, hdc in the next st, hdc2tog twice, hdc in the last 5 (7, 9) sts. Join. 24 (28, 32) sts.
Carry the toe marker into the corresponding new stitch in Rnds 4–5. In Rnd 6, the single hdc between the decrease groups should be worked into that marked stitch. Move the marker to the new hdc. In Rnd 7, the single hdc between the groups goes into that same marked stitch. If this does not align with the physical toe curve, stop and recheck the sole and round beginnings before proceeding.
Step 3. Add the Ribbed Cuff
- Rnd 8: Ch 2. Dc in every st. Join. 24 (28, 32) sts.
- Rnd 9: Ch 2. (FPdc around the next post, BPdc around the following post) around. Join. 24 (28, 32) sts.
- Rnd 10: Ch 2. Repeat the alternating post stitches, working FPdc around each raised front post and BPdc around each recessed back post. Join. 24 (28, 32) sts.
For a taller cuff, repeat Rnd 10 once more on both booties. Check that the opening stretches comfortably over the foot and does not feel tight around the ankle.

Finish and Match the Pair
Cut the yarn, pull the tail through the last loop, and weave both tails securely into the inside, changing direction. Compare both soles at the same stage, use the same number of cuff rounds, and check the finished pair after washing according to the yarn label. Record the hook size and measured sole length so the second bootie matches the first.
Troubleshooting
- Sole cups before the upper: Count all stitches and check that the increases sit on the short curved ends. A tight foundation chain can distort the sole; remake it with a relaxed chain and measure again.
- Toe looks off-center: Confirm that joins go into the first actual stitch and that starting chains or slip stitches have not been counted. Recheck the marked toe stitch before the decrease rounds.
- Cuff opening feels tight: Try a slightly larger hook for the cuff on both booties and keep joins relaxed. Check both stretch and recovery; if a comfortable fit is still not possible, reconsider the yarn or size.
Variations and Care
Use a contrast color for the whole cuff or keep the pair in one shade to emphasize the stitch texture. Leave the booties free of ties, buttons, beads, and tags. Follow the yarn label for washing, reshape gently, and dry as directed. Check for loose ends and remove the booties if they leave pressure marks or restrict movement. These soft booties are not designed to provide walking traction.
Frequently Asked Questions
Can I use cotton yarn?
A soft DK cotton or cotton blend can be tried, but its stretch may differ from a more elastic yarn. Check the sole dimensions, cuff opening, and how the fabric recovers after stretching. Yarn substitution has not been tested for this draft.
Do I need to make a left and a right?
No. Both booties use the same instructions. Keep the toe marker aligned and match the measurements of the two soles.
Can I make a taller cuff?
Yes. Repeat the last post-stitch round on both booties, using the same number of repeats and checking the fit.